Get 20% OFF on FluentCRM
WPdiscounts
For most WordPress business owners, “growth” usually comes with a hidden tax. As your email list expands from 1,000 to 10,000 subscribers, SaaS platforms like Mailchimp or ActiveCampaign begin to eat into your margins with steep monthly price hikes. You find yourself paying more just for the “privilege” of owning a larger audience, often while juggling disconnected data between your website and your email provider.
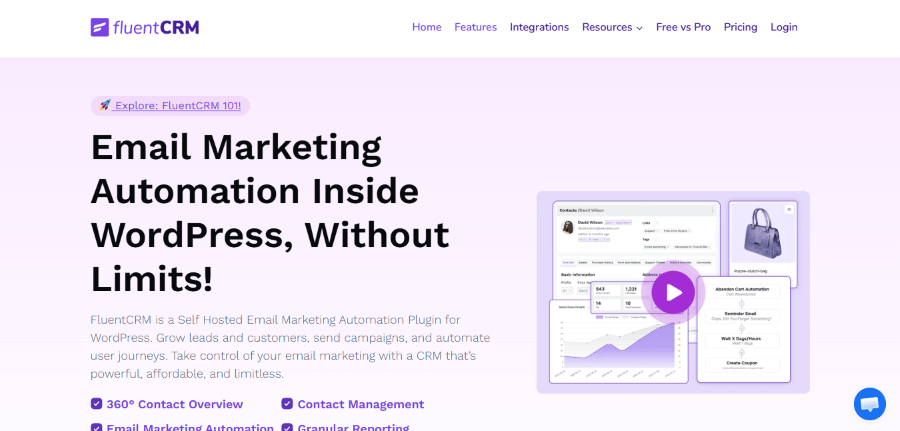
FluentCRM was built to break this cycle. Developed by the specialized team at WPManageNinja, it is a self-hosted email marketing automation plugin that turns your WordPress dashboard into a fully functional CRM. By living directly inside your website, it eliminates expensive third-party subscriptions and unstable API webhooks.
In this deep-dive review, we will explore how FluentCRM optimizes business workflows, the technical requirements for self-hosting your marketing, and why it is the definitive choice for professionals looking to scale without the “growth tax.”
The Problem: The High Cost of “Off-Site” Marketing
If you rely on an external email service provider (ESP), your daily operations likely suffer from three main friction points:
- Subscription Creep: SaaS platforms often charge based on the number of contacts in your database, not just the emails you send. If you have 5,000 inactive leads, you are still paying to keep them there.
- The “Data Wall”: When a customer buys a product in WooCommerce or finishes a lesson in LearnDash, that information has to be “sent” to your CRM. If the sync fails or is delayed, your automation breaks.
- Privacy and Compliance: Moving customer data to third-party servers in different jurisdictions makes GDPR and CCPA compliance a logistical nightmare.
FluentCRM resolves these issues by retaining 100% of your customer data on your own infrastructure. It acts as a direct, real-time bridge connecting your website’s database to your core marketing strategy.
Key Features of FluentCRM
1. 360-Degree Contact Management
FluentCRM offers a centralized profile for every user on your site. Unlike a standard WordPress “User” profile, the CRM view shows you:
- Purchase History: Every transaction and lifetime value (LTV) metric from WooCommerce or Easy Digital Downloads.
- Course Progress: Real-time lesson completion data from LearnDash, TutorLMS, or LifterLMS.
- Support Interactions: Historical logs of tickets submitted via Fluent Support.
- Email Engagement: Direct tracking of open rates, click-through rates (CTR), and specific link interactions.
This level of detail allows you to see the “human” behind the email address, making it easier to provide personalized service or targeted offers.
2. Advanced Segmentation (Lists and Tags)
Organization is the foundation of automation. FluentCRM uses a two-tier system:
- Lists: Broad categories (e.g., “Main Newsletter,” “Customers,” “Leads”).
- Tags: Specific labels based on behavior (e.g., “Abandoned Cart,” “VIP Buyer,” “Interest: SEO”).
The Pro version introduces Dynamic Segments, which automatically group contacts based on real-time data. For example, you can create a segment for “Customers who spent over $500 but haven’t bought in 30 days” and target them with a specific “Win-back” campaign.
3. Visual Automation Funnels
The automation builder is where FluentCRM truly shines. It uses a clean, vertical flowchart style that is easy to navigate even for low-tech professionals.
Each automation starts with a Trigger (an action taken by the user). Common triggers include:
- A new user signs up for WordPress.
- A tag is applied to a contact.
- A WooCommerce order is completed.
- A student starts or finishes a course.
From there, you can add Actions (Send an email, add a tag, wait 2 days) or Conditions (Check if they have a specific tag before proceeding). This allows you to build sophisticated “if-this-then-that” workflows that run 24/7.
How to Send Your First Newsletter Using FlentCRM
If you are a non-technical business owner, logging into a CRM for the first time can feel overwhelming. Here is a simple, highly detailed tutorial to guide you through creating, writing, and scheduling your very first email campaign in FluentCRM.
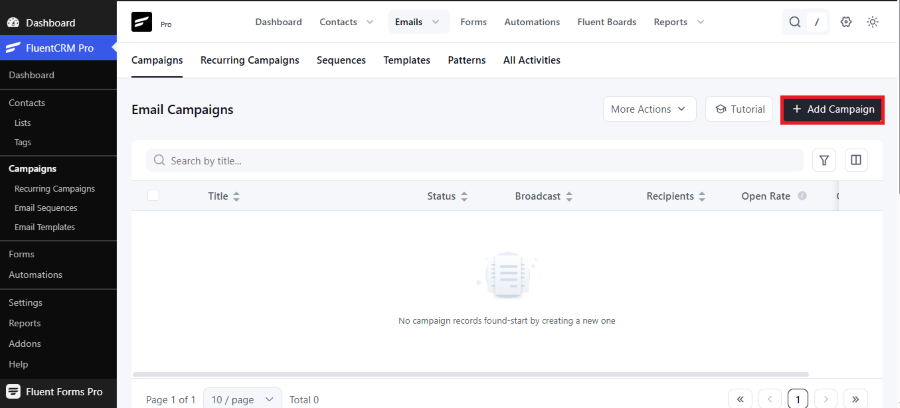
Step 1: Start a New Email Campaign
Log in to your WordPress dashboard and navigate to FluentCRM.
- Click on Emails in the top menu bar, and ensure you are on the Campaigns tab.
- On the right side of the screen, click the dark button labeled + Add Campaign.
Step 2: Name Your Campaign and Choose Your Editor
A pop-up window named Create Campaign will appear.
- Internal Campaign Title: Type a name for your email in the box. This name is only for your internal records to help you stay organized.
- Choose an Editor: Select your preferred writing tool. For a standard block-based experience similar to the regular WordPress editor, select Default (Gutenberg). You can also choose the Classic Editor, Raw HTML, or the Drag-and-Drop Visual Builder depending on your comfort level.
- Click the dark Create Campaign button in the bottom right corner of the popup.

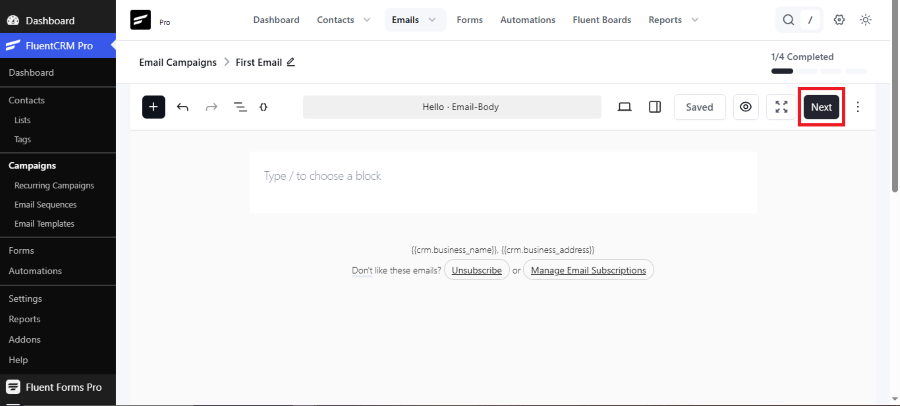
Step 3: Write Your Newsletter Body Content
You will now enter a clean, distraction-free writing space. This screen focuses entirely on the body copy of your newsletter.
- Click inside the large white area where it says Type / to choose a block.
- You can write your message directly here. If you want to add images, buttons, or headings, simply press the forward-slash key / on your keyboard to open up your block options.
- Once your message is fully written, click the dark Next button located in the top right corner of the screen.
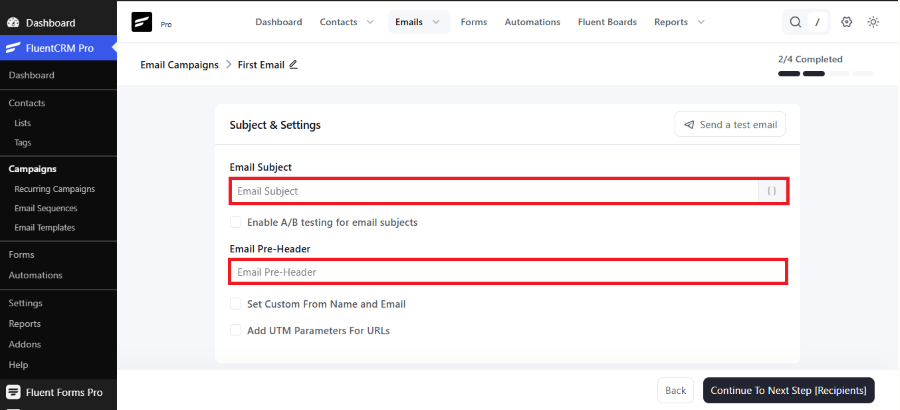
Step 4: Configure Your Subject Line and Settings
The updated FluentCRM interface separates your email content from your email settings. On this Subject & Settings screen, you fill out the vital details that readers notice in their inboxes.
- Email Subject: Enter your primary headline in this box. Make it engaging to encourage high open rates.
- Email Pre-Header: Write a short summary sentence here. This text displays right next to your subject line inside an inbox.
- Optional Settings: If you wish to change your sender name or track links, check the boxes for Set Custom From Name and Email or Add UTM Parameters For URLs.
- Click the dark Continue To Next Step [Recipients] button in the bottom right corner.
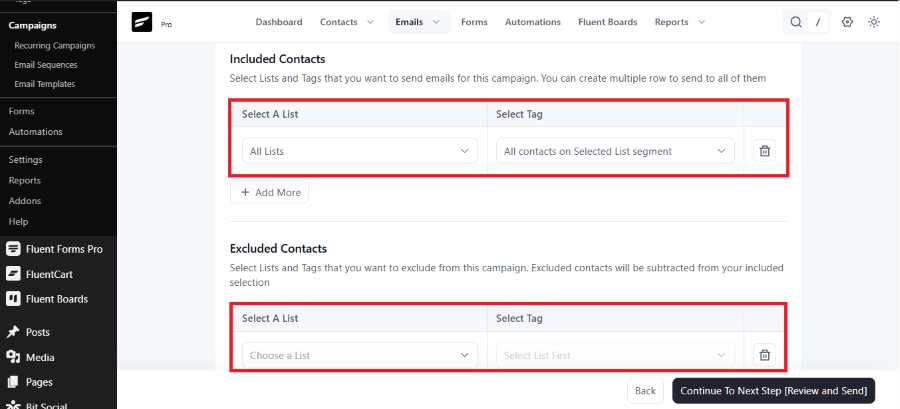
Step 5: Choose Your Audience
Now you need to target the specific people who should receive this update.
- Under Included Contacts, use the dropdown boxes to choose your specific contact List or filter by specific Tags. Leaving it on “All Lists” will send the newsletter to everyone in your database.
- Scroll down to find the Excluded Contacts section if you need to block specific groups from receiving this broadcast.
- Click the dark Continue To Next Step [Review and Send] button.
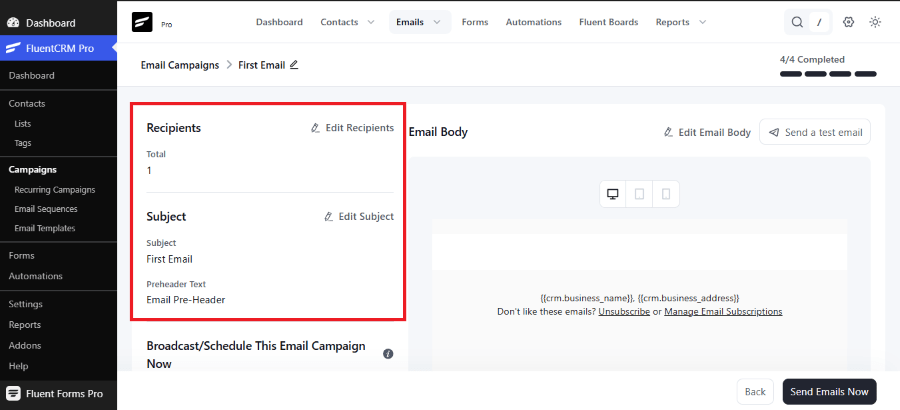
Step 6: Review, Test, and Broadcast
The final screen gives you a complete overview of your campaign data before it launches.
1. Send a Test Copy: Highly Recommended.
Look for the “Send a test email” button at the top of the settings page. Enter your personal inbox address to see exactly how the layout looks.
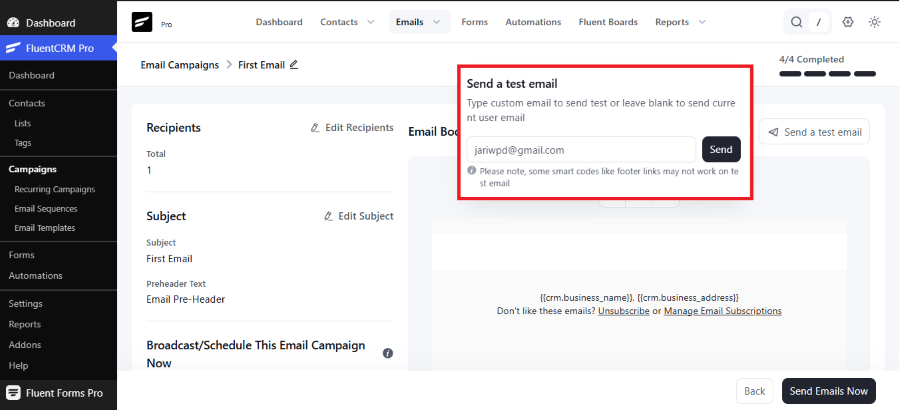
2. Final Checklist Verification: Required.
Review your subject line text, the target lists, and your sender details displayed on the final page summary.
3. Deliver the Message: Final Action.
Click the final send button to broadcast your newsletter to your audience immediately, or toggle the scheduling options to pick a later publication date.
FluentCRM vs. The Competition
To make a smart buying decision, you need to understand how FluentCRM stacks up against popular external SaaS platforms and native competitors.
| Feature | FluentCRM (Pro) | Mailchimp | Kit (ConvertKit) | MailPoet |
| Setup Process | Simple (WordPress Plugin) | Easy | Easy | Simple |
| Contact Storage | Self-Hosted (Unlimited) | External (Charged) | External (Charged) | Self-Hosted / External |
| Interface Speed | Instant (VueJS Dashboard) | Slow | Average | Average |
| WordPress Integration | Direct (No Webhooks) | Requires Integrations | Requires Integrations | Direct |
| SMS Marketing | Supported (v3.0+) | Paid Add-on | Not Included | Not Included |
| AI Copywriting | Natively Included | Paid Add-on | Limited | Not Included |
| Pricing Structure | Flat Annual License | Monthly Subscription | Monthly Subscription | Tiered Monthly Fee |
For Whom is FluentCRM Useful?
FluentCRM is not a “one-size-fits-all” tool, but it is the “best-fit” for specific business models:
1. The E-commerce Growth-Hacker
If you run a WooCommerce store, FluentCRM is a must. You can automate “Order Follow-ups,” “Upsell Campaigns,” and “Abandoned Cart” reminders without paying for extra plugins. It turns your store into a proactive sales machine.
2. The Online Educator
For those using LMS Hosting to run courses, FluentCRM is the perfect teaching assistant. You can automatically email students who haven’t logged in for a week or congratulate those who pass a quiz, significantly increasing course completion rates.
3. The Digital Agency
Agencies can use FluentCRM to manage their own lead pipeline or set it up for clients. Because of the “Single Site” vs. “50 Site” licensing, it is an incredibly profitable tool to include in a “Managed WordPress” service package.
Pricing
FluentCRM keeps its core cost predictable by using a straightforward annual flat-rate licensing model across three main tiers:
- Free Version: Available in the WordPress plugin repository. It supports unlimited contacts, basic email campaigns, and core contact management—ideal for simple blogs or brand-new sites.
- 1-Site License ($129 / Year): Unlocks all premium features, visual automation funnels, advanced reporting, and every native integration (WooCommerce, LearnDash, etc.) for a single domain.
- 5-Site License ($249 / Year): Expands full Pro features and priority updates to up to five active websites.
- 50-Site License ($499 / Year): Designed for agencies and multi-site operators, bringing the per-site software cost down significantly.
Get 20% OFF on FluentCRM
WPdiscounts
Final Verdict: Is it Right for Your Website?
FluentCRM is a professional-grade tool designed for those who want to take full control of their marketing stack. It removes the technical and financial barriers of third-party CRM platforms while offering a “native” WordPress experience.
Pros:
- Unlimited contacts with no “per-lead” pricing.
- Deep, native integrations with the WordPress ecosystem.
- Complete ownership of customer data.
- Incredible cost savings compared to SaaS competitors.
Cons:
- Requires a quality server environment (LiteSpeed is highly recommended).
- Initial setup requires connecting an SMTP service (though this only takes 5 minutes).
If you are a professional looking to improve your website’s efficiency, automate your sales funnels, and protect your margins, FluentCRM is the most logical choice on the market today.
Frequently Asked Questions (FAQ)
1. Can I import my contacts from Mailchimp?
Yes. FluentCRM has a built-in CSV importer. You can export your list from any other provider and map the fields (Email, Name, Tags) directly into FluentCRM in seconds.
2. Is FluentCRM better than Groundhogg?
Both are excellent self-hosted CRMs. However, FluentCRM is often preferred for its modern VueJS interface and its “all-in-one” pricing, whereas Groundhogg uses an extension-based model that can become more expensive depending on which features you need.
3. Does it work with page builders like Breakdance or Elementor?
Yes. FluentCRM integrates with almost all major form builders. You can capture leads using your favorite page builder and automatically “push” them into a FluentCRM list.
4. What happens if I stop paying the annual fee?
Unlike SaaS tools, your data is never “locked.” If you don’t renew, the plugin will still work, but you will lose access to security updates and premium support.