
A static website built with HTML and CSS gives developers control over page structure, layout, and appearance. However, making routine changes often requires editing code, checking stylesheets, and testing the result. This can become difficult for business owners and teams who need to update website content without relying on a developer.
WordPress.org documents the Custom HTML block as a way to insert HTML markup and preview its output. Bricks Builder offers a more flexible approach for converting an existing design. Its HTML & CSS to Bricks feature converts pasted HTML and CSS into native Bricks elements, reusable classes, and global variables.
Introduced in Bricks 2.3, this feature lets you bring existing layouts into the visual builder instead of recreating every section manually. You can then adjust supported styles through the builder’s controls and refine the layout without starting from scratch.
This tutorial explains how to convert an HTML/CSS static website into a WordPress site using Bricks Builder, preserve its design, and prepare it for future updates.
What Does Converting an HTML/CSS Website to Bricks Builder Mean?
A traditional static website uses HTML to define its content and structure, while CSS controls its appearance. JavaScript may handle interactive features such as dropdown menus, tabs, and other actions.
Bricks Builder is a WordPress theme and visual website builder. Its HTML & CSS to Bricks feature recognizes standard HTML elements and translates them into editable Bricks elements. For example, a <section> can become a Section element, a <div> can become a Div, and heading tags can become native Heading elements.
The converter also identifies CSS classes and CSS variables. Supported properties, such as margin, padding, and typography, can appear in Bricks’ visual controls. Styles that do not have a matching control can remain in custom CSS.
This distinction matters: Bricks converts pasted code into native Bricks elements, not Gutenberg blocks. It also does not automatically migrate an entire static website, its hosting, or all its functionality. You will still need to handle page content, assets, scripts, links, and other website features.
What You Need Before Starting
Prepare the following items before converting your website.
- Existing website files: Keep your HTML files, CSS stylesheets, images, fonts, icons, and JavaScript files available.
- A WordPress installation: Use a local development environment or a staging website so you can work without affecting your live site.
- Bricks Builder: Install and activate the Bricks theme using a valid license.
- Website backup: Save a copy of your original website and back up the WordPress installation before making major changes.
- Access to the source code: You should be able to copy the HTML structure and its related CSS.
- A secure builder connection: Bricks reads pasted code through the browser’s Clipboard API. Use HTTPS or a trusted local development address, and allow clipboard access when prompted.
If you are working on a large website, identify the pages and shared sections first. The header, footer, navigation, and repeated content blocks often need special attention because they appear across several pages.
HTML/CSS to Bricks vs. Other Conversion Methods
There are different ways to bring an existing static design into WordPress. The best option depends on how much editing flexibility you need.
| Approach | How it works | Best for | Main limitation |
| HTML & CSS to Bricks | Converts pasted markup and styles into native Bricks elements and classes | Reusing existing layouts while gaining visual editing controls | Some CSS and functionality need manual refinement |
| Manual Bricks rebuilding | You recreate the layout with the builder’s elements and styling controls | Websites that need a major redesign or structural changes | Requires more manual work |
| WordPress Custom HTML block | Stores HTML markup inside a WordPress block | Embedding code or preserving a small custom section | Does not provide the same native Bricks editing workflow |
| Keeping the static website | Continues serving the existing HTML, CSS, and related files | Small websites that rarely change | Content updates may require code edits or developer assistance |
For most projects that need to retain their existing appearance while moving to WordPress, the HTML & CSS to Bricks converter is a useful starting point.
Step 1: Prepare Your HTML and CSS Files
The first step is to prepare the source code you want to convert.
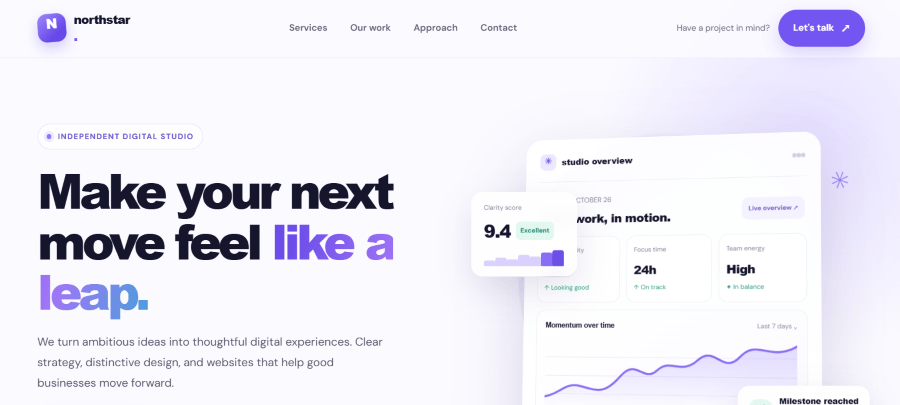
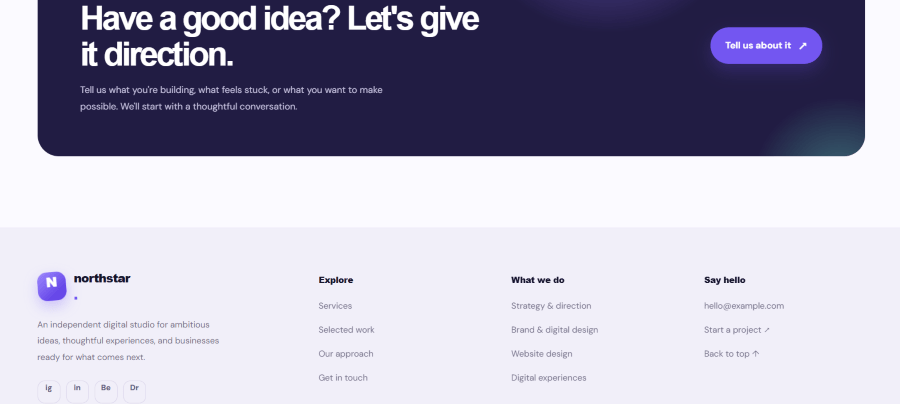
For this example, we have already created the agency website using HTML and CSS. The HTML defines the website’s sections and content, while the CSS controls its colors, spacing, typography, responsive layout, and animations.
If you are using the sample website, open the prepared source file in Notepad. Keep the complete HTML markup and its associated CSS together so Bricks can process both.
Before copying the code, check that the file contains the website content and styling you want to import.
Pay attention to external font imports. During this tutorial, we encountered a CSS parsing error because a Google Fonts import was split across multiple lines, leaving an incomplete fragment in the stylesheet. We removed the broken import and used a standard font fallback to continue the conversion.
For your first attempt, use clean HTML and CSS without an external font import. You can adjust the typography in Bricks after converting the layout.
Save a copy of the original source before making changes.
HTML:
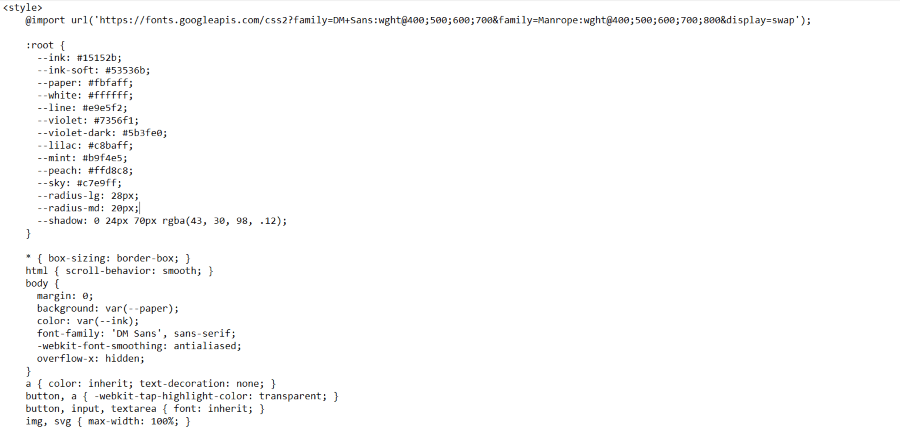
CSS:
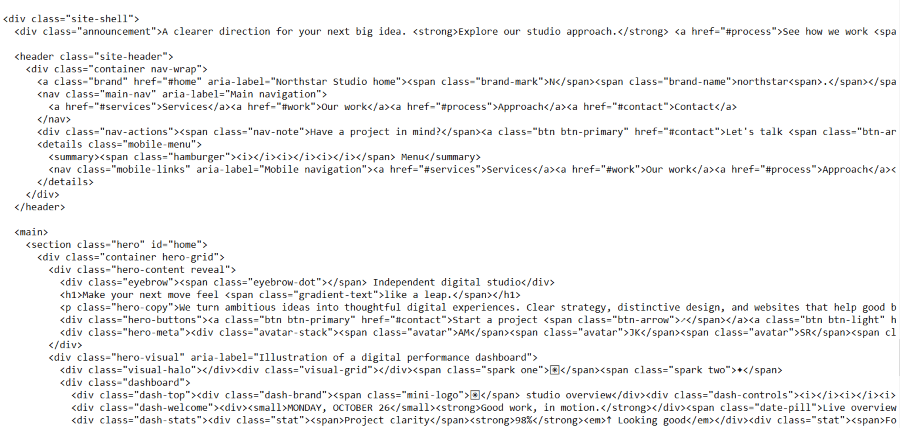
Step 2: Enable HTML & CSS in Bricks
Before pasting any code, you need to make sure Bricks is configured to recognize HTML and CSS from your clipboard.
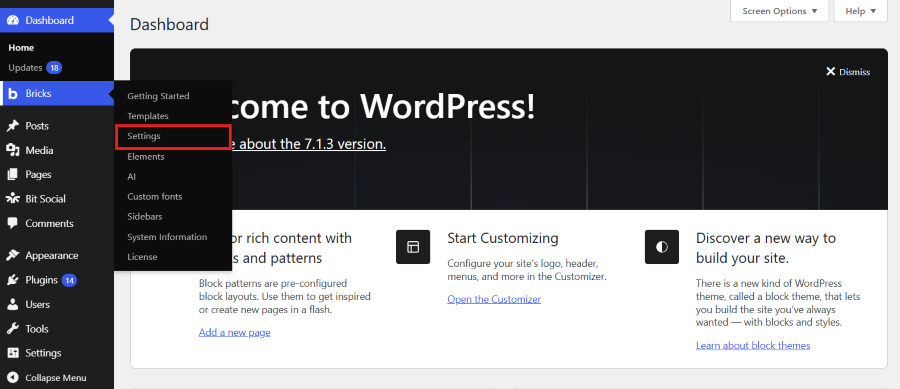
1. Open Bricks Settings in WordPress
Log in to your WordPress dashboard and locate Bricks in the left-hand admin menu. Hover over it or click it to view the available options, then select Settings.
2. Open the Builder Settings
On the Bricks Settings page, look for the Builder tab or section. Click it to access the options related to the visual editing interface.
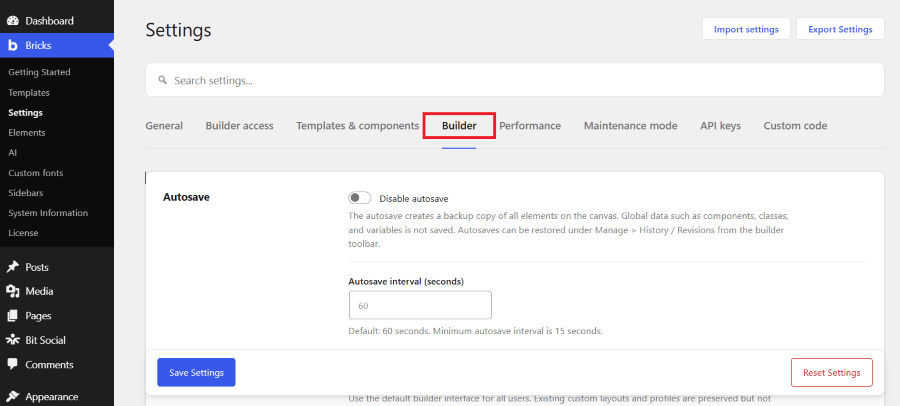
3. Locate the HTML & CSS to Bricks Option
Inside the Builder settings, look for the option named HTML & CSS to Bricks. This setting controls whether Bricks detects pasted HTML and CSS and offers to convert it into native builder elements.
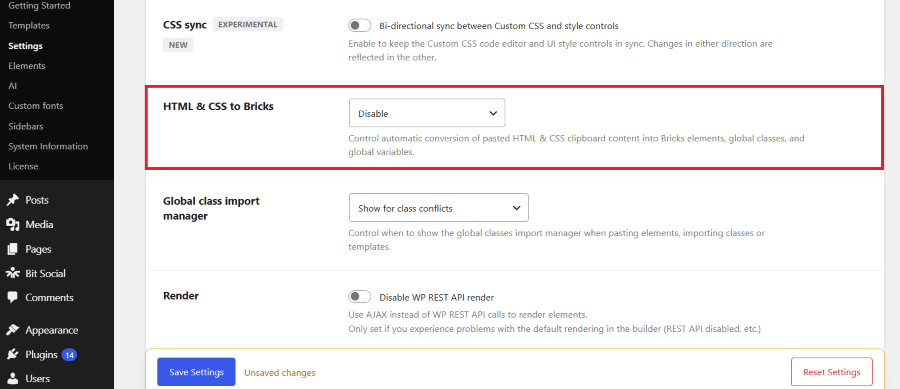
4. Enable Conversion With Confirmation
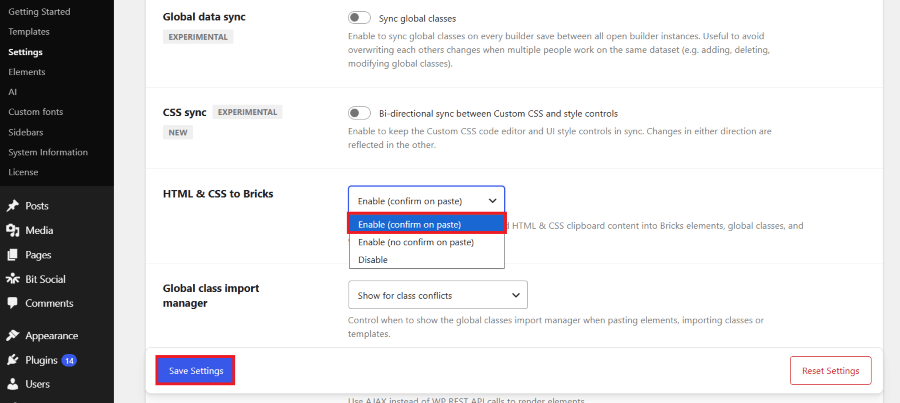
Open the setting’s dropdown menu and select Enabled (confirm on paste). This option enables the conversion feature while asking you to confirm when Bricks detects supported code on your clipboard.
It is a suitable choice for your first conversion because you can review the action before Bricks processes the pasted content. You can change this preference later if your workflow requires a different behavior.
After selecting the option, look for the “Save Settings” option to save the changes.
Step 3: Create a New WordPress Page
Now you need a page where Bricks can place the converted website layout.
From your WordPress dashboard:
- Go to Pages → Add New Page.
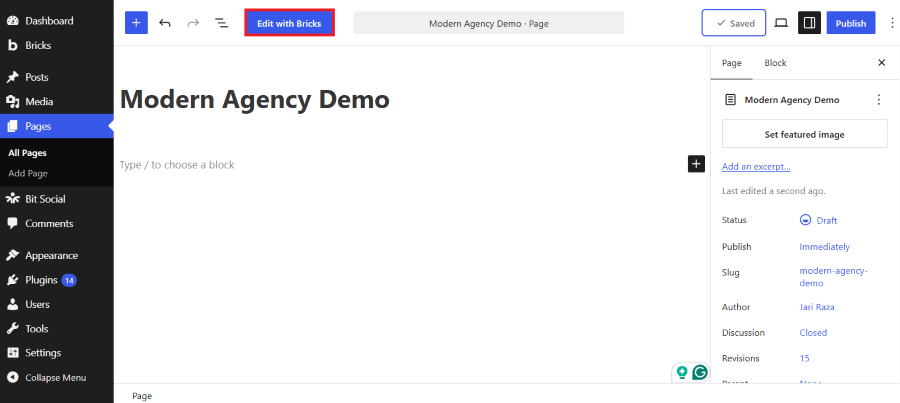
- Enter a name such as Modern Agency Demo.
- Save the page as a draft.
- Open it using Edit with Bricks.
You should now see the Bricks Builder interface. Depending on your setup, the canvas may display an empty page or the default page structure.
Using a new draft page helps protect your existing website. If something goes wrong during conversion, you can test the process again without affecting a published page.
If you plan to convert a complete website with multiple pages, start with the homepage. Once you understand the process, you can repeat it for your other pages.
Step 4: Copy the Prepared HTML and CSS
Open the source file you prepared in Step 1.
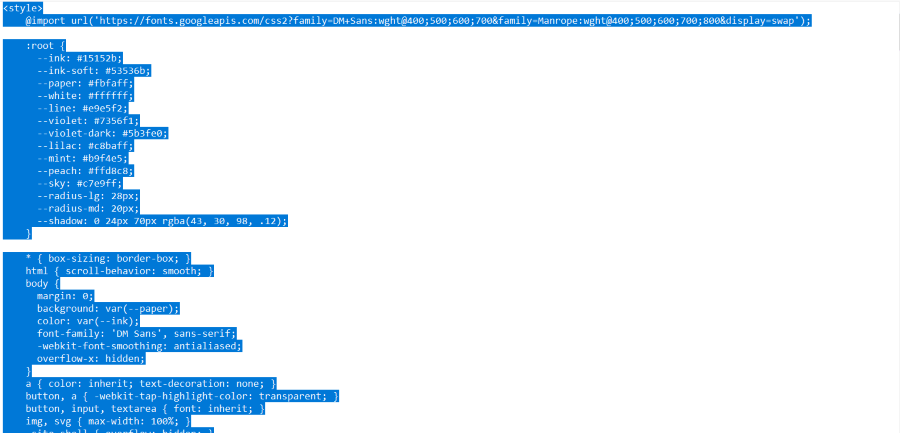
If you are using the sample code, open the TXT source file that contains the HTML and CSS prepared for Bricks conversion, rather than copying code from the rendered website in your browser. Open the source file in Notepad and copy the whole code.
Keep the HTML markup and CSS together. Bricks needs HTML to create elements and CSS to identify classes, variables, and supported styling rules.
If you are working with a complete standalone HTML document, use the page’s relevant HTML content and styling rather than copying unnecessary document wrappers or unrelated code.
Step 5: Paste the Code Into Bricks Builder and Check Converted Website Structure
Open your page in Bricks Builder and click the main canvas. Press Ctrl + V to paste the copied HTML and CSS. When Bricks asks for confirmation, approve the conversion.
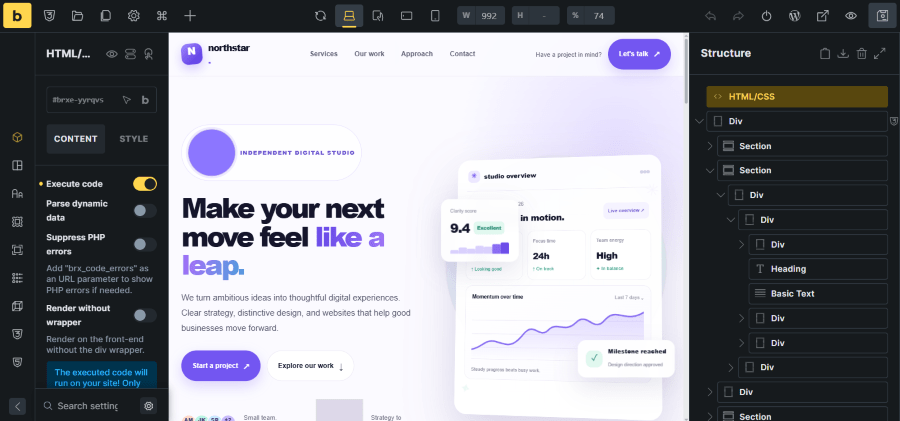
Bricks will convert supported code into native elements and apply the recognized styleAfter conversion, check the page canvas and Structure panel. Confirm that the header, hero section, service cards, and footer appear correctly.
Select a heading or text element to verify that you can edit its content directly in Bricks. Also check for missing styles or duplicate headers and footers.
Step 9: Check the Website on Desktop and Mobile
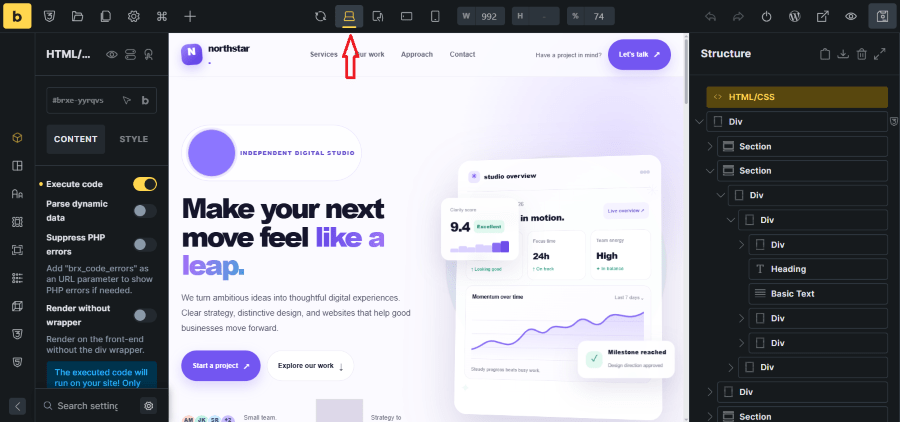
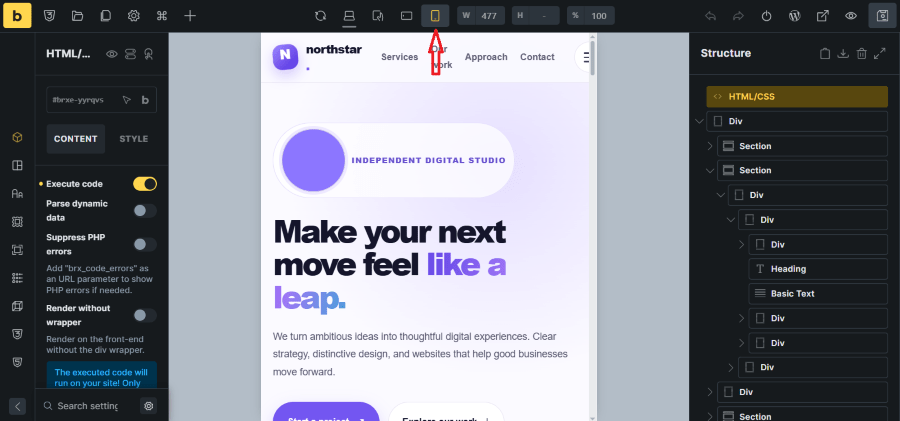
Use Bricks’ responsive preview controls to check how the website looks on desktop and mobile screens. Make sure the navigation, text, buttons, and service cards fit properly.
Adjust any elements that overflow or appear misaligned, then preview the page on the frontend.
Step 10: Save and Preview the Finished Page
After checking the structure, styling, and responsive layout, save or update the page in Bricks Builder.
Open the page on the frontend to see how it appears to visitors.
Test the navigation links, buttons, section anchors, and any other interactive elements. Replace the sample business name, contact details, and placeholder links with your own information before publishing.
Also check the images and other assets. A converted image element does not guarantee that every source file is available in WordPress, so replace missing assets and verify their URLs.
Bricks does not automatically execute pasted JavaScript or load external stylesheets without review. Any detected scripts or external links must be reviewed, and the necessary code must be authorized and saved according to Bricks’ security controls. Static forms that depend on backend processing also need to be connected to a suitable service or WordPress solution.
If the page is replacing a live static website, review the old URLs and configure redirects where necessary before switching over.
Once the page has passed these checks, it is ready for publication.
Bricks Builder Pricing and Who Should Use It
Bricks is a paid theme and visual builder. It has a very straightforward pricing plan.
| Plan | Published price | Website allowance |
| Starter | $79 per year | 1 website |
| Business | $149 per year | 3 websites |
| Agency | $249 per year | Unlimited websites |
The plans include the available builder features, updates, and technical support. Local and staging sites do not count against the license limit. Taxes may apply at checkout, and pricing can change, so confirm the terms before purchasing.
Get Bricks Builder Lifetime Deal for $599
Bricks Builder also offers an Ultimate Lifetime plan for users who don’t want to pay an annual subscription. It costs $599 as a one-time payment and includes unlimited website usage, future updates, new features, and technical support.
With this plan, you can use Bricks Builder on unlimited websites without renewing your license every year.
Final Thoughts
Converting an HTML/CSS website into Bricks Builder is easier when you treat it as a structured migration rather than a simple file upload. The HTML & CSS to Bricks feature can convert pasted markup into native elements and preserve supported styling, giving you a practical foundation for visual editing.
The key is to review each converted section, reconnect assets and functionality, test responsive layouts, and build reusable templates where appropriate. With those steps completed, you can manage the website through WordPress and Bricks instead of relying on manual code edits for every content or design change.
