
WordPress is highly flexible; you can edit anything and create any page templates that you want. The default WordPress comment forms are good for most use cases, but what if you want to add or remove any comment field? Luckily, there is a way, and we are going to explore 2 methods to add custom fields to WordPress comment forms.
In the first method, we are going to use the Advanced Custom Fields plugin, which is the most popular plugin to add custom fields to any WordPress post, page, form, etc.
And in the second method, we are going to add custom code to our functions.php file. Both methods are safe to use, but we recommend taking a backup of your website before making any changes.
Understanding WordPress Comment Fields
By default, WordPress comment forms include these fields:
- Name (Author)
- Email Address
- Website (URL)
- Comment Text Box
Depending on your site and audience, you may not need all of these fields.
For example:
- If users are already logged in, you may not need their name or email.
- If spam links are a problem, removing the Website field can reduce spam submissions.
- If you need more information, such as a phone number or social media handle, you can add custom fields with ACF.
Recommended Read: You may be interested in checking out 8+ ACF Alternatives that perform just as well as ACF.
Method#1: Using ACF Plugin to Add Custom Fields In the Comments Form
ACF plugin is a very intuitive plugin that helps keep custom fields organised and easy to edit. This is our recommended method to add fields to the WordPress comment form.
Step 1: Install and Activate the ACF Plugin
Log in to your WordPress dashboard.
Navigate to Plugins → Add New.
Search for Advanced Custom Fields.
Click Install Now and then Activate.
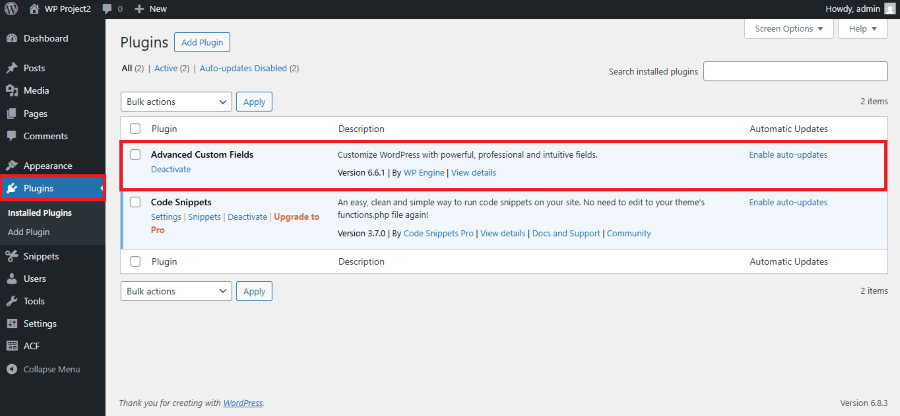
Once activated, ACF is ready to create custom fields for your comment form.
Step 2: Create Custom Comment Fields
Go to Advanced Custom Fields → Field Group in the dashboard.
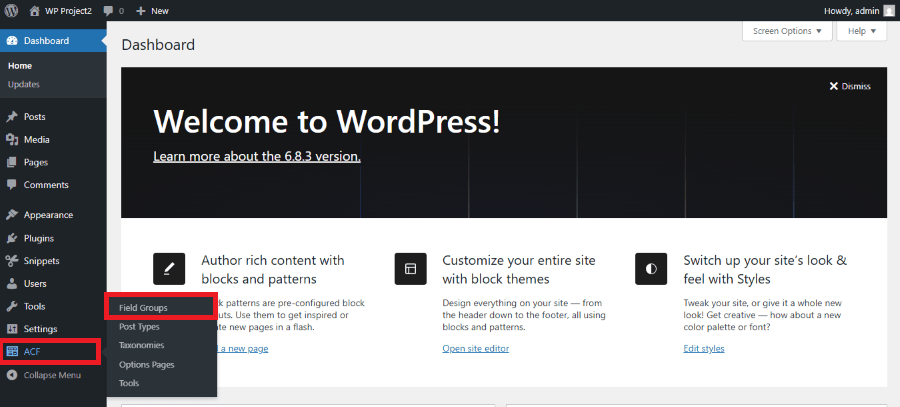
Name your field group, for example, “Extra Comment Fields.”
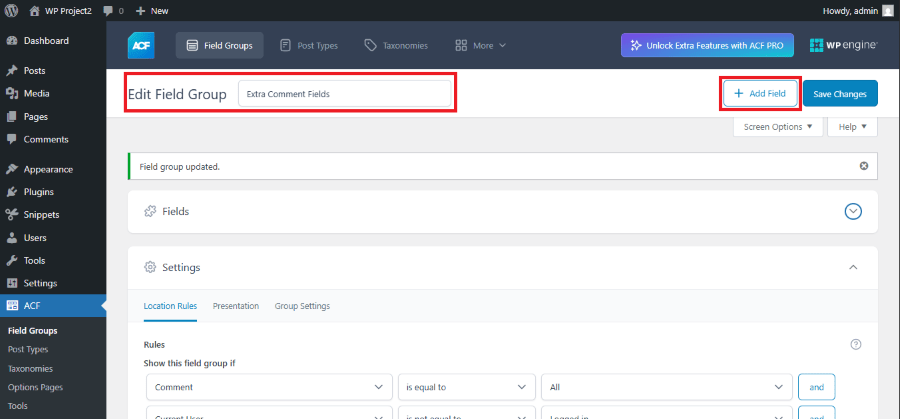
- Click Add Field and configure:
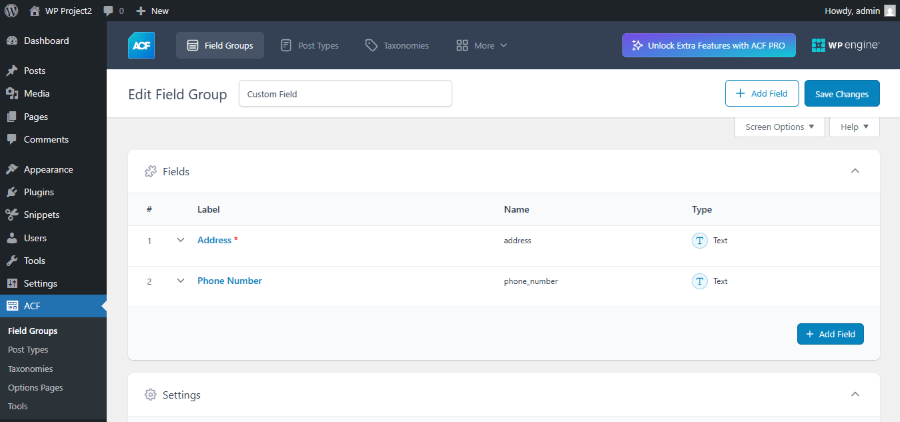
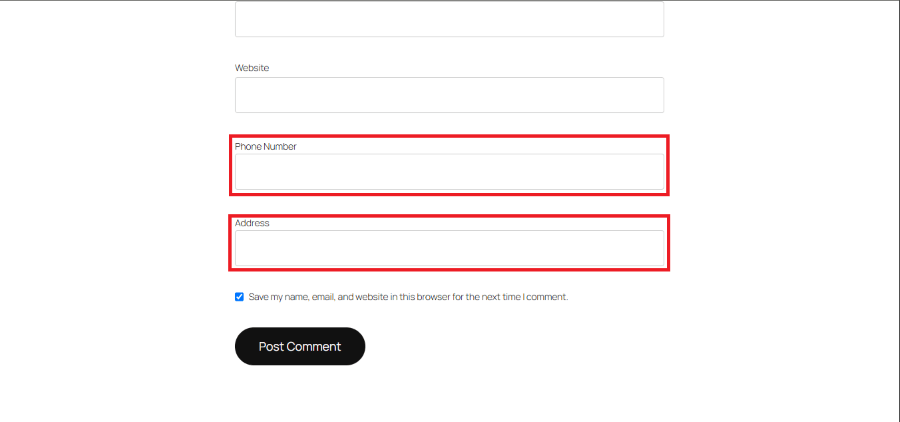
Now we add some new custom fields like
- Address
- Phone Number
- Under Location, select Show this field group if→Comment Form→Is Equal to→All.
- And add another setting for Current User if → Current User→Is Equal to→Logged In.
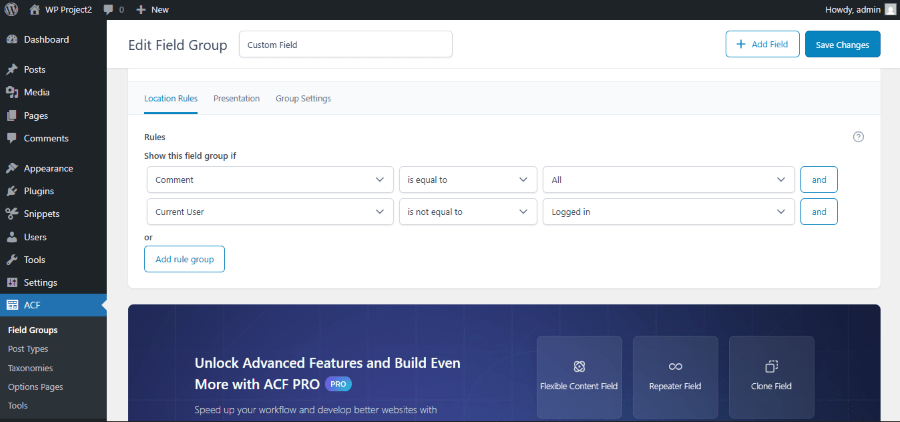
- Click Save Changes.
Now your custom comment fields will appear on the comment form.
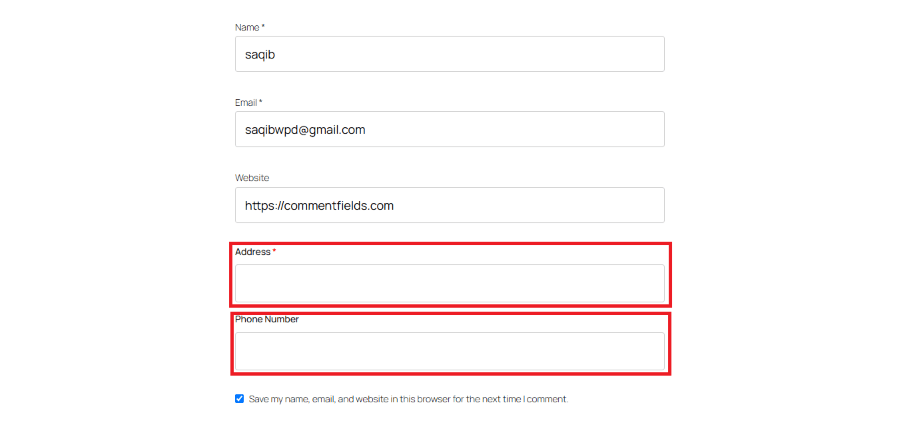
That’s it, using the process above, you can safely add custom fields to your WordPress comment form.
Method#2: Add Comment Fields Manually By Using Code:
If you do not prefer to use a plugin to add custom fields in WordPress comment forms, then you can easily achieve the same results by adding custom code in WordPress’s functions.php file.
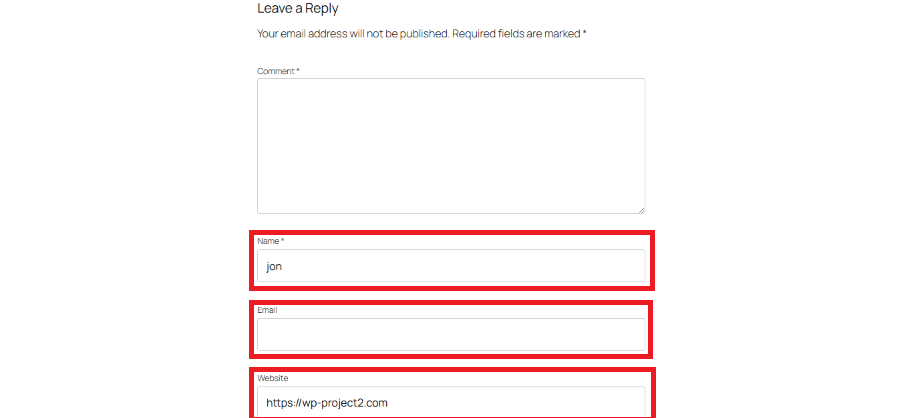
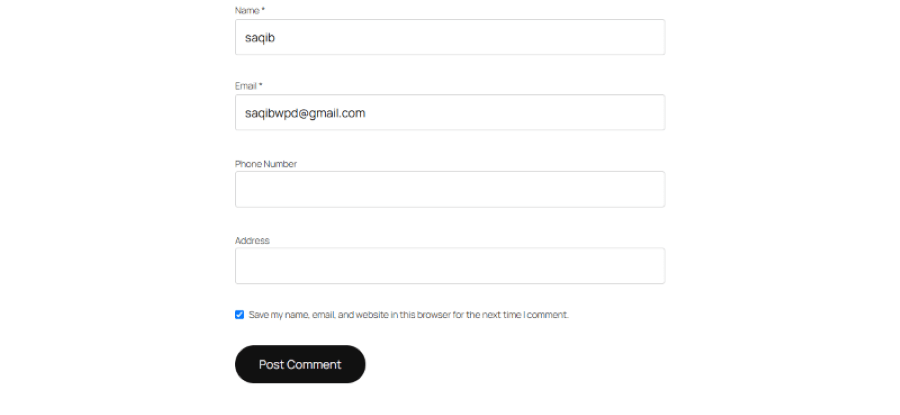
In this image, we can see three default fields: Name, Email, and Website. Now, let’s add two new fields, the Phone Number field & Address field, using code. Open the functions.php file and paste the following code at the end.
Step 1: Open Your Theme’s functions.php File
Go to your active theme folder, usually found under public_html > wp-content > themes > {your_theme_name} > functions.php, and open the functions.php file. You’ll add the following code snippet at the end of the file.
Important Note: Back up the functions.php file before making an edit.
Step 2: Add Custom Comment Fields
Paste the following code at the bottom of the existing code inside the functions.php:
// Add custom comment fields (Phone & Address)
function custom_comment_fields($fields) {
    $fields['phone'] = '<p class="comment-form-phone">
        <label for="phone">Phone Number</label>
        <input id="phone" name="phone" type="text" size="30" />
    </p>';

    $fields['address'] = '<p class="comment-form-address">
        <label for="address">Address</label>
        <input id="address" name="address" type="text" size="50" />
    </p>';

    return $fields;
}
add_filter('comment_form_default_fields', 'custom_comment_fields');
Tip: Replace the “Phone Number” and “Address” with your desired field name.
Step 3: Save Custom Fields Data
By default, WordPress saves the existing fields in its database, which are easily accessible through your WordPress dashboard under WP Admin > Comments.
In order to store custom fields data, we will need to add the following code to the functions.php file.
// Save custom comment field values
function save_custom_comment_meta_data($comment_id) {
    if (isset($_POST['phone'])) {
        add_comment_meta($comment_id, 'phone', sanitize_text_field($_POST['phone']));
    }
    if (isset($_POST['address'])) {
        add_comment_meta($comment_id, 'address', sanitize_text_field($_POST['address']));
    }
}
add_action('comment_post', 'save_custom_comment_meta_data');
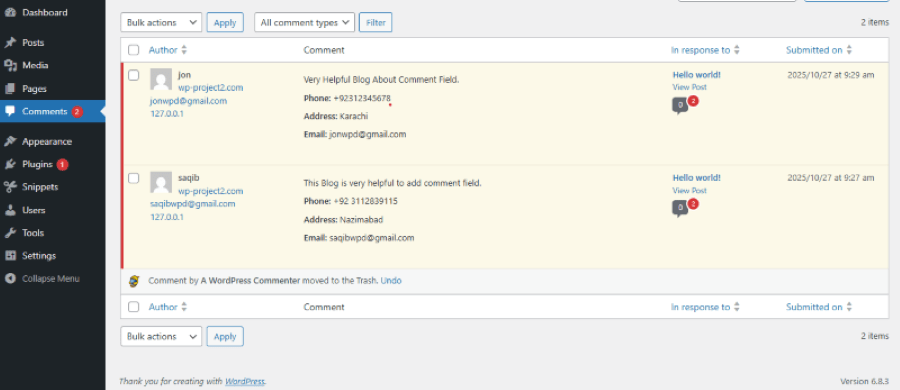
Step 4: Display Custom Fields in Comments
To show the fields under each comment on our WordPress website’s frontend, add this code inside functions.php:
// Display phone and address in comment
function display_custom_comment_meta($comment_text, $comment) {
    $phone = get_comment_meta($comment->comment_ID, 'phone', true);
    $address = get_comment_meta($comment->comment_ID, 'address', true);

    if ($phone || $address) {
        $comment_text .= '<p><strong>Phone:</strong> ' . esc_html($phone) . '</p>';
        $comment_text .= '<p><strong>Address:</strong> ' . esc_html($address) . '</p>';
    }
    return $comment_text;
}
add_filter('comment_text', 'display_custom_comment_meta', 10, 2);
Use either method as stated above to add fields in the WordPress comment form. We recommend using one method as both achieve the same objective.
Method To Remove Comment Fields From WordPress Manually By Using Code:
Sometimes you may want to remove unnecessary fields like “Website” or “Email” from the WordPress comment form to make it simpler or keep the spam bots away. You can easily do this by adding a few lines of code to your functions.php file.
Step 1: Open the functions.php File
Go to your active theme folder and open the functions.php file.
Step 2: Add the Code to Remove Fields
Paste the following code at the end of the file:
// Remove Website field from comment form
function remove_website_field_from_comments($fields) {
    unset($fields['url']); // 'url' is the Website field
    return $fields;
}
add_filter('comment_form_default_fields', 'remove_website_field_from_comments');
After saving, the website fields will no longer appear in your comment form.
This is a clean and simple way to control which fields show up no plugins required!
Conclusion
Adding or removing custom comment fields in WordPress manually gives you full control over your website’s comment form. With just a few lines of code, you can easily collect extra details like phone numbers and addresses without relying on plugins. This approach keeps your site lightweight, flexible, and tailored to your specific needs.
